Battle of Wagram, 1809
Two days of competitive homicide.
The noise was deafening, all encompassing,
as if the world was indeed ending.
|
1. Introduction: The War of 5th Coalition. - - War ! > - - Bridges Over Danube > - - On Lobau Island > - - Austrians Defeat Napoleon at Aspern-Essling > - - Napoleon Crosses Danube Again > 2. Armies at Wagram. - - Austrian Order of Battle > - - French Order of Battle > 3. Battle Plans and Deployment of Troops + (Map) 4. The Battle. - - Right Flank: Davout vs Rosenberg > - - Center: Bernadotte's Saxons vs Bellegarde > - - Left Flank: Massena's Advance > - - The Austrians Took, Lost and Retook Aderklaa > - - Austrian Offensive > - - French Heavy Artillery on Lobau Island > - - Massena Marched Toward the Austrian Breakthrough > - - Charge of French Cuirassiers > - - French Guard Artillery > - - Seeing Davout's Progress, Napoleon Announced - - "The Battle is Won." > - - Along the Russbach Stream > - - MacDonald's Multi-battalion Column - - Dented The Austrian Line But Could Not Break It. > - - Napoleon Decided to Commit His Reserves > - - Austrian Withdrawal > 5. Peace and Assassination Attempt on Napoleon. 6. Sources and Links.
|

through Austrian fire to be present when the massive column (three divisions formed into one monstrous formation!) moved out towards Sussenbrunn, flags flying, drums beating the charge and the men cheering. The Austrians opened up with everything they had. Soon 15 French guns were disabled and within an hour the column was reduced to little more than half-strength. Macdonald continued forward and dented the Austrian line but could not break it. - Rothenburg
Napoleon sent courier to Davout to hurry him along. |
|

Introduction. Events of 1809: in Northern America the Territory of Illinois organizes (incl. present-day Wisconsin), the first U.S. steamboat to a make an ocean voyage, severe earthquakes strikes the Azores, famous Austrian composer Joseph Haydn dies, and Napoleon Bonaparte divorces Empress Josephine.
Although grimly prepared to fight alone, Austria sought allies. Prussia secretly promised support, but when the time came, proved afraid to deliver. Great Britain offered up minor subsidies and indicated that she would send a small corps to the northern Europe. Napoleon failed to secure Russia's compliance with the armistice agreement of 1807. Therefore, in January 1809, the Ottoman government concluded the Treaty of the Dardanelles with Britain (being now in war with both France and Russia). That power that counted most in 1809 - Russia - was not yet ready to abandon her alliance with France.
Meanwhile, a new French army led by Napoleon himself entered Spain and dealt blow after blow to the
opposing Spanish forces. Napoleon entered Madrid and then unleashed Marshal Soult's troops against Moore's British
forces. The British were swiftly driven to the coast and defeated at
Corunna by Marshal Soult. Moore's redcoats hastily embarked and left Spain.
The Emperor returned to Paris leaving Spain to his marshals; Soult, Victor, Ney and others. They will soon face another British general, Wellesley, and British-German-Portuguese army. The war in Peninsula will take several long years. Napoleon was hastening from Paris towards the primary theater of war in central Europe. (See map below.) He concentrated his troops in Bavaria. Inflamed by patriotic feelings Austria went to war, one army invaded Bavaria and another entered Italy. Napoleon marched against the strung out and confident whitecoats. At Abensberg, he split the Austrian army in two, and vigorously pursued. The French won at Landshut and Eckmuhl, and captured Ratisbon. Napoleon then marched on Vienna and crossed the Danube at Aspern-Essling. Unfortunately the bridge was broken by high waters and objects sent down by the Austrians.
Maps of Europe 1809 (ext.links) - 1, - 2,
Baron de Marbot of French cavalry described this action:
"Marshal Lannes ordered General Saint-Hilaire to send 500 men to the island of Schwarzelaken,
which is separated
from the left bank by a small arm of the river, and almost reaches the end of the Spitz
bridge. General Saint-Hilaire composed this force of men from two regiments under two majors, which was likely to
interfere with combined action. Thus, on reaching the island these officers, not acting in concert, committed the great
mistake of having no reserve in a large house well placed for protecting the landing of more troops.
In the evening the French pontoneers had completed the second bridge and Molitor's infantry division (of MdE Massena's IV Army Corps) crossed over the river. By exercising great care, the cannons and howitzers were brought across. French horse battery drove off Austrian battery. However the effort to push 50,000 infantry and cavalry across the river became tangled and the problem delayed deployment of French forces until after the Austrians had a chance to react. After the French light cavalry moved to the front, the second bridge broke. It was soon repaired and in the night the rest of Massena's IV Army Corps reached the Austrian bank. The next day Massena climbed the church tower in Aspern and watched the Austrian positions. His soldiers built several earthworks near the bridgehead.
Majority camped in the open and slept on the ground, with their greatcoats rolled up as pillows. Only few built huts. "There were many happy renewals of friendship as French soldiers who had been scattered in garrisons throughout Europe met one another for the first time since departing the camps along the Atlantic coast back in 1805." (- James Arnold) Marbot writes: "On the evening of May 20, the Emperor and Marshal Lannes being lodged in the only house which existed on the island, my comrades and I took up our quarters close by, in brilliant moonlight, on beautiful turf. It was a delicious night, and with the carelessness of soldiers, thinking nothing of the morrow's dangers, we chatted gaily, and sang the last new airs ..." (Marbot - "The Memoirs of Baron de Marbot" Vol. I) On the other side of the river the French could see a level expanse stretching to the villages of Aspern and Essling, and the wooded heighs of Bisamberg.
Austrians defeat Napoleon at Aspern-Essling.
In the morning the Austrian troops took up their position facing the French in Essling and Aspern.
Unfortunately MdE Massķna failed to have loopholed the houses of these villages.
His infantrymen occupied the two strongpoints; the church in Aspern and granary in Essling.
BessiĶres' Reserve Cavalry was formed in the space between Essling and Aspern.
The overall command over Massena and Bessiers was given to the French Ajax, Marshal Lannes.
At dawn of the 22nd the battle was resumed. Massķna cleared Aspern of the Austrians, but at the same time Rosenberg
stormed Essling. In Aspern, Massķna was driven out by a counter-attack of Hiller and Bellegarde.
The whole of the French center, with Lannes on the left and the cavalry in reserve, moved forward.
News of the victory spread in Europe like wildfire. The battle demonstrated how far the
Austrian army had progressed since the catastrophic defeats in 1800 and 1805. (- wikipedia.org 2007)
.
The Emperor established his headquarters on Lobau Island on 3rd July.
Marshal MacDonald writes: "It was clear that a great operation was being prepared. We were not the last to arrive,
and by nine o'clock in the evening of July 4 we were at our posts on the Danube at the crossing-place that had been selected
for the surprise of the enemy. We had marched sixty leagues in three days, and notwithstanding our excessive fatigue,
and the heat of the season, we had but few laggards, so anxious were the men of the [French] Army of Italy to take part in
the great events that were preparing, and to fight in presence of their brothers-in-arms of the [French] Grand Army, and
under the very eyes of the Emperor.
On 4th July the French troops were ready to cross Danube again. The advance guard crossed the river
in the night in boats and rafts. It was raining and the Austrians were not too vigilant.
The French took the Austrian camp by surprise and captured prisoners. Large flatboats were employed as pontoons to carry a bridge.
Once the bridge was secure Oudinot's II Army Corps left the island and moved against the whitecoats.
Oudinot ordered the Portuguese infantry to digg trenches to protect the bridges.
Before midnight 109 heavy guns on island opened fire on Austrian fortifications.
The rain ended in early morning of the next day. Austrian advance posts were able to
see masses of French soldiers on both sides of the river. The Austrian emperor and Archduke Charles were
in Bisamberg and realized that Nordmann's advance guard won't be able to halt the enemy.
Between 2 and 4 PM the French surged through Raasdorf.
The center of the attacking force was the 57th Line (nickamed "The Terrible 57" for their ferocity in combat), the flower of the French
infantry; but many other regiments took part in the assault. They stormed Baumersdorf with elan but were
repulsed by the Austrians.
Von Angeli described the fight for Baumersdorf: "One exchanged musketry at very close range.
The enormous din, as wave upon wave of musketry constantly erupted ...is completely beyond the imagination.
Evrything, even the thunder of the numerous cannon, seemed insignificant amid the raging storm of the so-called
smallarms."
Meanwhile Oudinot's infantry crossed Russbach before the Vincent Chevauxlegeres
drove them back.
The Saxons stormed Wagram and attempted to capture the 20-pace-wide bridge.
The Austrians opened musket fire from buildings and across the river.
Although the elite Saxon LeibGarde held the ground they have suffered badly.
As night fell there was a great deal of confusion.
The French and the Austrians set up their videttes on an arc several miles long.
|
Armies at Wagram.
French and Austrian Order of Battle.
French ranks:
MdE - Marķchal d'Empire
GdD - Gķnķral de division
GdB - Gķnķral de Brigade
Col. - Colonel
Mjr. - Major
Allies ranks:
FM - Feldmarschall (Field Marshal)
GdK - Generall der Kavallerie (General of Cavalry)
GdI - Generall der Infanterie (General of Infantry)
FzM - Feldzeugmeister
FL- Feldmarschall-Leutenant
GL - Generalleutnant (General Lieutenant)
GM - Generallmajor (General Major)
AUSTRAIN ORDER OF BATTLE
Commander: Archduke Charles
The Austrian army at Wagram (128,968 men) was commanded by Archduke Charles, and consisted of the following units: Advance Guard of the Army, I, II, III, VI Army Corps, I Reserve Corps, and Cavalry Corps. The Chief-of-Staff of the army was GM Max von Wimpfen.
The Austrian troops were well-trained. The individual regiments of light cavalry, the artillery, and the grenadier battalions were superb. The Austrians were inferior to the French mainly on multi-regimental level. Although Archduke Charles was no Napoleon, he was an excellent commander and one of the top generals in Europe.
|
Commander: FML Armand von Nordmann
- - - - - - - - Cavalry Brigade: GM Schneller
.
|
Commander: GdK Heinrich Graf Bellegarde
- - - - - - - - Advance Guard Brigade: GM Stutterheim
|
|
Commander: GdK Friedrich Hohenzollern
- - - - - - - - Advance Guard Brigade: GM Graf Hardegg |
Commander: FZM Karl Graf Kollowrath-Krakowski
- - - - - - - - Advance Guard Brigade: GM Schneller
.
.
|
|
Commander: FML Franz von Rosenberg-Orsini
- - - - - - - - Advance Guard Brigade: GM Provencheres
.
.
.
|
Commander: FML Johann Graf von Klenau
- - - - - - - - Advance Guard Brigade: GM Wallmoden |
|
Commander: GdK Johann Liechtenstein
Grenadier Division: FML Aspre von Hoobruck
.
|
Commander: GdK Friedrich Hessen-Homburg
Cuirassier Division: FML Hessen-Homburg |

FRENCH ORDER OF BATTLE
Commander: Emperor Napoleon
Chief-of-Staff: MdE Berthier
Napoleon's army at Wagram (178,400 men) consisted of the following units: Imperial Guard, Reserve Cavalry, II, III, IV, IX, XI Army Corps, Wrede's Bavarians, and Eugene's so-called Army of Italy. These units were commanded by Bessieres, Davout, Massena, Macdonald, Marmont, Eugene, and Wrede.
Napoleon's forces:
|
Commander: .....
1st Guard Infantry Division: GdD Curial
|
Commander: MdE Jean-Baptiste Bessieres
1st Heavy Cavalry Division: GdD Nansouty
.
|
|
Commander: GdD Oudinot
- - - - - - - - Light Cavalry Brigade: GdB Colbert |
Commander: MdE Davout
- - - - - - - - Light Cavalry Brigade: GdB Pajol
.
.
.
|
|
Commander: MdE Massena
- - - - - - - - Light Cavalry Brigade: GdB Marulaz |
Commander: MdE Bernadotte
- - - - - - - - Light Cavalry Brigade: GM Gutschmidt
.
.
.
.
.
.
.
.
.
.
|
|
Commander: Marmont
1st Infantry Division: GdD Montrichard
|
(On Davout's III Army Corps' flank)
Dragoon Division: GdD Grouchy
.
.
.
|
Commander-in-Chief: GdD Prince Eugene de Beauharnais
(Eugene was a brave and generous man, very close to his stepfather Napoleon)
|
Commander: Macdonald
1st Infantry Division: GdD Broussier
.
Royal Italian Guard: GdD Lecchi ======================================
2nd Bavarian Division: Wrede |
Commander: GdD Grenier
Light Cavalry Division: GdD Sahuc
.
.
.
.
.
.
.
.
.
.
.
.
.
|
|
Battle Plans and the Deployment of Troops.
Karl von Clausewitz writes: "The left wing, which was opposed to the Austrian right resting on the Danube, was extremely weak and was totally defeated. Even their centre at Aderklaa was not very strong, and was obliged to give way to the Austrians on the first day. But that did not signify, because the EmperorÆs right, with which he attacked the Austrian left in front and flank, had such a depth that he brought a heavy column of cavalry and horse artillery to bear upon the Austrians in Aderklaa, and if he did not beat them, was able, at all events, to stop their progress."
.
.
.
(number of infantry battalions, cavalry squadrons, and guns)
Before midnight Archduke Charles issued battle instructions.
His all army corps were to form in two lines, screened by skirmishers and supported by artillery.
"Recalling the success of his fire ships, the erzherzog (archduke) ordered that the 18 great fire rafts already built by his pontoneers be
launched into the Danube's current laden with stones and barrels of gunpowder.
Charles hoped that they would ram and burn their way through the French bridges to create havoc similar to that which had occured in May."
(- James Arnold)
|
|
 Battle of Wagram, 1809.
|
|
Peace and attempt to assassinate Napoleon.
Napoleon promoted generals MacDonald and Oudinot to the rank of marshal.
Also General Marmont became marshal. However the news came to Marmont with Napoleon's words "Between ourselves, you have
not yet done enough to justify my choice."
In October France and Austria signed a peace agreement. Austria had to pay a huge monetary indemnity to the French. The Austrian Empire ceded the maritime Croatia, the ports of Fiume, Istria and Trieste, along with Carinthia to France. Grand Duchy of Warsaw (one of France's allies) reincorporated Lublin and Krakow. Overall, Austria lost 3,5 million inhabitants and access to the Adriatic Sea. There was an attempt to assassinate Napoleon. Just few days after the signing of the Treaty of Sch÷nbrunn, an eighteen-year-old German patriot called Friedrich Stapps approached Napoleon during an army review and attempted to stab the emperor, but he was intercepted by General Rapp. Stapps was interogated and executed. On the scaffold Stapps had loudly exclaimed, "Liberty for ever ! Germany for ever !"
until the mighty Russia once again fought Napoleonic France in 1812.
|
Sources and Links.
James Arnold - "Napoleon Conquers Austria", Praeger Publishers, Connecticut USA
Baron de Marbot - "The Memoirs of Baron de Marbot" Vol. I
The Department of History at the US Military Academy - series of campaign atlases
Marbot - "Memoirs of General Baron de Marbot"
Macdonald - "Recollections of Marshal Macdonald"
Chandler - "Dictionary of the Napoleonic Wars"
Elting - "Swords Around a Throne"
MacDonald - "Recollections of Marshal MacDonald."
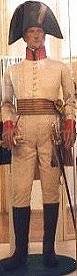
The small picture of French light infantry, by Giuseppe Rava
Erzherzog Karl von ųsterreich, Herzog von Teschen (Archduke Charles)
Marshal Louis Nicolas Davout
Marshal Andrķ Massena
Marshal Bessieres
Deutsch Wagram
Travel to Wagram
Napoleon, His Army and Enemies
 In 1809 Napoleon confronted his
  Johann-Philipp-Karl-Joseph Stadion played a large part in the formation of the 3rd and 5th
coalition against France. Notwithstanding the failure of this alliance in 1805, he was made
foreign minister, and pursued a policy of quiet preparation for a fresh trial of strength with
Napoleon. In 1808 Stadion abandoned the policy of procrastination, and with the help of
Metternich hastened the outbreak of a new war.
Johann-Philipp-Karl-Joseph Stadion played a large part in the formation of the 3rd and 5th
coalition against France. Notwithstanding the failure of this alliance in 1805, he was made
foreign minister, and pursued a policy of quiet preparation for a fresh trial of strength with
Napoleon. In 1808 Stadion abandoned the policy of procrastination, and with the help of
Metternich hastened the outbreak of a new war.
 According to Englund, Napoleon was not ready for a fight right now.
His army was busy in Spain fighting against the guerillas. Russia was a dubious ally.
There were numerous French troops occupying various German states. Speaking shortly, Napoleon's army was divided.
Fortunately Austria's strategy was helping him. The Austrians divided their army into three separate
groups, one in Germany, one in Italy and one in Poland. It would turn out to be a major mistake.
(Englund - "Napoleon: A Political Life")
According to Englund, Napoleon was not ready for a fight right now.
His army was busy in Spain fighting against the guerillas. Russia was a dubious ally.
There were numerous French troops occupying various German states. Speaking shortly, Napoleon's army was divided.
Fortunately Austria's strategy was helping him. The Austrians divided their army into three separate
groups, one in Germany, one in Italy and one in Poland. It would turn out to be a major mistake.
(Englund - "Napoleon: A Political Life")
 The French first attempt to cross Danube failed. The voltigeurs of 72nd and 105th Line, supported
by an entire infantry battalion were attacked by Nordmann's Grenzers and Vienna Volunteers.
The French were driven back, some to a corner of an island, and approx. 700 surrendered.
The French first attempt to cross Danube failed. The voltigeurs of 72nd and 105th Line, supported
by an entire infantry battalion were attacked by Nordmann's Grenzers and Vienna Volunteers.
The French were driven back, some to a corner of an island, and approx. 700 surrendered.
 On May 18 the French voltigeurs rowed across the Danube carrying a cable that would
support the bridge to the large Lobau Island. The voltigeurs cleared the island and
construction of a bridge began. Trees were cut down and the abandoned buildings were dismantled to provide necessary lumber.
Once ready, Napoleon moved his troops and artillery on the island.
The cannons and howitzers dominated the area that would become the bridgehead, later called tete de pont.
On May 18 the French voltigeurs rowed across the Danube carrying a cable that would
support the bridge to the large Lobau Island. The voltigeurs cleared the island and
construction of a bridge began. Trees were cut down and the abandoned buildings were dismantled to provide necessary lumber.
Once ready, Napoleon moved his troops and artillery on the island.
The cannons and howitzers dominated the area that would become the bridgehead, later called tete de pont.
 Energy, endurance, and skill were taxed to the utmost; but the crossing was effected.
Napoleon's army camped on Lobau Island covered in meadows, scrub and woods of elms and willows.
It was incredible assembly of the best troops and generals of Europe.
Energy, endurance, and skill were taxed to the utmost; but the crossing was effected.
Napoleon's army camped on Lobau Island covered in meadows, scrub and woods of elms and willows.
It was incredible assembly of the best troops and generals of Europe.
 1. Bridges on Danube. On the island stood French heavy guns.
To damage the bridges the Austrian engineers had
launched boats laden with rock into the current.
1. Bridges on Danube. On the island stood French heavy guns.
To damage the bridges the Austrian engineers had
launched boats laden with rock into the current. The Austrian army had 70,000 infantry, 12,000 cavalry and 288 guns.
At 2 PM the whitecoats attacked.
At once there opened such an artillery combat as the armies had never before seen.
It was almost impossible for aids to report or for orders to be given from the center of so much noise and confusion
Great volumes of smoke, however, soon obscured the battlefield, and many of the soldiers could not see that there was a
foe in front of them until they were within short range of the enemy line.
The Austrian army had 70,000 infantry, 12,000 cavalry and 288 guns.
At 2 PM the whitecoats attacked.
At once there opened such an artillery combat as the armies had never before seen.
It was almost impossible for aids to report or for orders to be given from the center of so much noise and confusion
Great volumes of smoke, however, soon obscured the battlefield, and many of the soldiers could not see that there was a
foe in front of them until they were within short range of the enemy line.
 The Austrian line was broken through and victory was almost won when Archduke Charles brought up his last reserve,
leading his soldiers with a colour in his hand (see picture). Lannes was checked, and with his repulse the impetus of the attack died out
all along the line. Aspern had been lost, and the bridges had been cut by heavy barges, which had been sent drifting down stream
by the Austrian engineers.Napoleon at once suspended the attack.
Essling was taken by the Austrians and then lost.
The Austrian line was broken through and victory was almost won when Archduke Charles brought up his last reserve,
leading his soldiers with a colour in his hand (see picture). Lannes was checked, and with his repulse the impetus of the attack died out
all along the line. Aspern had been lost, and the bridges had been cut by heavy barges, which had been sent drifting down stream
by the Austrian engineers.Napoleon at once suspended the attack.
Essling was taken by the Austrians and then lost.
 The French lost over 20,000 men including Marshal Lannes, who died after being mortally wounded by an
Austrian cannonball. The Austrians had also suffered similar casualties but had secured the first major victory against the
French for over a decade.
The French lost over 20,000 men including Marshal Lannes, who died after being mortally wounded by an
Austrian cannonball. The Austrians had also suffered similar casualties but had secured the first major victory against the
French for over a decade.
 It was Henri Gratien Bertrand who directed the building of the bridges by which the French army crossed the Danube at Wagram.
His life was closely bound up with that of Napoleon, who had the fullest confidence in him.
He accompanied Napoleon to Elba Island in 1814.
(Condemned to death in 1816, he did not return to France until after Napoleon's death, and then
King Louis XVIII granted him amnesty.)
It was Henri Gratien Bertrand who directed the building of the bridges by which the French army crossed the Danube at Wagram.
His life was closely bound up with that of Napoleon, who had the fullest confidence in him.
He accompanied Napoleon to Elba Island in 1814.
(Condemned to death in 1816, he did not return to France until after Napoleon's death, and then
King Louis XVIII granted him amnesty.)
 Napoleon had not been idle.
The French commander had formulated his battle plans by the time he had his army on Lobau
Island. The enemy was known to be in large force behind the river, and this made the crossing of
Danube exceedingly hazardous.
The French occupied Vienna with infantry and the Lobau Island with heavy artillery.
The main army held line from Aspern (left flank), to Aderklaa and Wagram in the center,
and to Markgrafneusiedel on the right flank. The Imperial Guard,
cuirassiers, and Marmont's and MacDonald's corps stood in reserve.
Napoleon's plan hinged on Davout's attack against the Austrian left flank and the village of
Markgrafneusiedel. Davout planned to fix the Austrians with two divisions while his other
two maneuvered to outflank the enemy.
Napoleon had not been idle.
The French commander had formulated his battle plans by the time he had his army on Lobau
Island. The enemy was known to be in large force behind the river, and this made the crossing of
Danube exceedingly hazardous.
The French occupied Vienna with infantry and the Lobau Island with heavy artillery.
The main army held line from Aspern (left flank), to Aderklaa and Wagram in the center,
and to Markgrafneusiedel on the right flank. The Imperial Guard,
cuirassiers, and Marmont's and MacDonald's corps stood in reserve.
Napoleon's plan hinged on Davout's attack against the Austrian left flank and the village of
Markgrafneusiedel. Davout planned to fix the Austrians with two divisions while his other
two maneuvered to outflank the enemy.
 General Jomini writes: "At Wagram his [Napoleon's] order was ... bringing up two masses
upon the center and right, while keeping
back the left wing; and this he wished to repeat [in 1812] at
General Jomini writes: "At Wagram his [Napoleon's] order was ... bringing up two masses
upon the center and right, while keeping
back the left wing; and this he wished to repeat [in 1812] at
 Napoleon observed the countryside, hunched over the mane of his horse.
One of Guard Chasseurs carried Napoleon's despatch case and another his field glass.
If the Emperor dismounted his escort would immediately do likewise.
The Emperor was surrounded by generals and staff officers. Couriers began to move briskly about.
Napoleon observed the countryside, hunched over the mane of his horse.
One of Guard Chasseurs carried Napoleon's despatch case and another his field glass.
If the Emperor dismounted his escort would immediately do likewise.
The Emperor was surrounded by generals and staff officers. Couriers began to move briskly about.
 Davout's corps was more trustworthy and exact in the performance of its duty than any
other troop except the Imperial Guard. It was often entrusted with the most difficult
part of the work in hand. Napoleon had great confidence in Davout's abilities
and he became Emperor's most effective and feared marshal.
Davout's corps was more trustworthy and exact in the performance of its duty than any
other troop except the Imperial Guard. It was often entrusted with the most difficult
part of the work in hand. Napoleon had great confidence in Davout's abilities
and he became Emperor's most effective and feared marshal.
 At 7 AM Marshal Bernadotte counterattacked with infantry and cavalry.
The fire all along the line was terrific. It is a wonder how anything human could have stood before it.
The Saxons and French (Dupas' division) had enough, they failed to retake Aderklaa and withdrew.
Two Austrian battaries deployed on their flank and
poured in a destructive enfilade fire. Some of the Saxons and Frenchmen broke and fled.
At 7 AM Marshal Bernadotte counterattacked with infantry and cavalry.
The fire all along the line was terrific. It is a wonder how anything human could have stood before it.
The Saxons and French (Dupas' division) had enough, they failed to retake Aderklaa and withdrew.
Two Austrian battaries deployed on their flank and
poured in a destructive enfilade fire. Some of the Saxons and Frenchmen broke and fled.
 MdE Massena left Boudet's division in Aspern, by the river, and with the rest of his corps
began moving in the direction of Wagram and Aderklaa. Massena rode in a coach.
(Napoleon said of Massķna: he was "the greatest name of my military Empire.")
MdE Massena left Boudet's division in Aspern, by the river, and with the rest of his corps
began moving in the direction of Wagram and Aderklaa. Massena rode in a coach.
(Napoleon said of Massķna: he was "the greatest name of my military Empire.")
 Austrian offensive against the left flank interrupted Massena's march.
Legrand's division halted and faced the advancing whitecoats.
Massena's own nerves somewhat unsettled as he watched the approach of Austrian cavalry followed by long columns
of infantry, he realized that he has to act fast as his troops were now surely outnumbered and outgunned.
Austrian offensive against the left flank interrupted Massena's march.
Legrand's division halted and faced the advancing whitecoats.
Massena's own nerves somewhat unsettled as he watched the approach of Austrian cavalry followed by long columns
of infantry, he realized that he has to act fast as his troops were now surely outnumbered and outgunned.
 The noise was deafening, all encompassing, as if the world was indeed ending.
The men could not help but be thrilled by the power and intensity of it.
The noise was deafening, all encompassing, as if the world was indeed ending.
The men could not help but be thrilled by the power and intensity of it.
 Meanwhile Klenau's VI Army Corps and Kollowrath-Krakowski's III Army Corps
advanced slowly against French left flank. Klenau and Kollowrath had approx. 30,000 men
(One infantry brigade was detached from V Army Corps facing Vienna and attached
to III Army Corps) and they moved toward Aspern.
Meanwhile Klenau's VI Army Corps and Kollowrath-Krakowski's III Army Corps
advanced slowly against French left flank. Klenau and Kollowrath had approx. 30,000 men
(One infantry brigade was detached from V Army Corps facing Vienna and attached
to III Army Corps) and they moved toward Aspern.
 MdE Massena rallied his troops near Raasdorf and then began his march toward
the Austrian breakthrough along the Danube River. Napoleon strengthened him with
St.Sulpice's cuirassiers. Massena's corps completed the march in no longer than 2 hours.
His troops suffered from artillery flank fire and were attacked by Hungarian hussars.
MdE Massena rallied his troops near Raasdorf and then began his march toward
the Austrian breakthrough along the Danube River. Napoleon strengthened him with
St.Sulpice's cuirassiers. Massena's corps completed the march in no longer than 2 hours.
His troops suffered from artillery flank fire and were attacked by Hungarian hussars.
 General Antoine-Charles Lasalle was the most famous French light cavalryman.
"The man for high adventure and reckless deeds. In 1806 after the Battle of Jena,
with only 900 hussars at his back and no weapon heavier than their
popgun carbines, he bluffed the great fortress of Stettin, with 200 guns and a garrison
of 5,000 men, into surrender. ... Utterly brave, loving danger, laughing at his own
hardships, frequently charging with a long pipe instead of a saber in his hand ...."
(- Elting "Swords Around a Throne", p 163)
General Antoine-Charles Lasalle was the most famous French light cavalryman.
"The man for high adventure and reckless deeds. In 1806 after the Battle of Jena,
with only 900 hussars at his back and no weapon heavier than their
popgun carbines, he bluffed the great fortress of Stettin, with 200 guns and a garrison
of 5,000 men, into surrender. ... Utterly brave, loving danger, laughing at his own
hardships, frequently charging with a long pipe instead of a saber in his hand ...."
(- Elting "Swords Around a Throne", p 163)
 The Austrian offensive on the flank was over. It was one of the greatest assaults in any battle of modern times,
and it had failed. In the center however, fighting was general along the line. The French infantry stiffened their resistance
and then MdE Bessieres took Nansouty's 1st Heavy Cavalry Division, and advanced against
Kollowrath's infantry and the grenadiers. The French raised themselves in their stirrups and made for them.
The Austrian offensive on the flank was over. It was one of the greatest assaults in any battle of modern times,
and it had failed. In the center however, fighting was general along the line. The French infantry stiffened their resistance
and then MdE Bessieres took Nansouty's 1st Heavy Cavalry Division, and advanced against
Kollowrath's infantry and the grenadiers. The French raised themselves in their stirrups and made for them.
 After the cavalry fighting was ended a fierce artillery duel ensued and some wheat fields began to burn.
Some of the shells (grenades) exploded before they had halfway crossed the plain. The dense smoke prevented the gunners from seeing anything beyond
their immediate front.
After the cavalry fighting was ended a fierce artillery duel ensued and some wheat fields began to burn.
Some of the shells (grenades) exploded before they had halfway crossed the plain. The dense smoke prevented the gunners from seeing anything beyond
their immediate front.
 During this conflict the artillery on either side had participated so far as the safety of their own troops would permit.
The French offensive would be preceded by a terrific cannonade.
At 11:30 AM the Emperor ordered Lauriston to bring the
Guard Artillery and deploy south of Aderklaa. To the right of the 72 guns of the Guard Artillery were 40 guns
from the Army of Italy. The massive battery was deployed "well within musket range of the
white-coated infantry" (- James Arnold)
During this conflict the artillery on either side had participated so far as the safety of their own troops would permit.
The French offensive would be preceded by a terrific cannonade.
At 11:30 AM the Emperor ordered Lauriston to bring the
Guard Artillery and deploy south of Aderklaa. To the right of the 72 guns of the Guard Artillery were 40 guns
from the Army of Italy. The massive battery was deployed "well within musket range of the
white-coated infantry" (- James Arnold)
 Only the Austrian grenadiers held their ground. These men stood there under the fire coolly, awaiting an
opportunity to strike a blow.
The men on the Austrian side who were not at the point directly menaced peered anxiously across the space between
the lines to watch the next French move. As the sun waxed higher and higher, the smoke, powder, dust, and heat became insufferable,
and the men moved in a grimy, reddish haze.
Only the Austrian grenadiers held their ground. These men stood there under the fire coolly, awaiting an
opportunity to strike a blow.
The men on the Austrian side who were not at the point directly menaced peered anxiously across the space between
the lines to watch the next French move. As the sun waxed higher and higher, the smoke, powder, dust, and heat became insufferable,
and the men moved in a grimy, reddish haze.
 On the French right flank Davout was ready for action.
At Wagram Rosenberg "assigned the defence of the tower and the village [of Markgrafneusiedel] to FML Radetzky, who used the dry moat
around the tower to shelter some of his infantry. He placed the reliable Stain Infantry
Regiment along the southwest perimeter of the village." (- James Arnold)
On the French right flank Davout was ready for action.
At Wagram Rosenberg "assigned the defence of the tower and the village [of Markgrafneusiedel] to FML Radetzky, who used the dry moat
around the tower to shelter some of his infantry. He placed the reliable Stain Infantry
Regiment along the southwest perimeter of the village." (- James Arnold)
 Two of Davout's four infantry divisions (Gudin's 3rd and Puthod's 4th)
attacked the village of Markgrafneusiedel from the south, while two other infantry divisions,
Morand's 1st and Friant's 2nd, attempted to outflank the village.
(General Charles-Alexis-Louis-Antoine Morand got the command of Davout's prestigous 1st Division in 1806.)
Two of Davout's four infantry divisions (Gudin's 3rd and Puthod's 4th)
attacked the village of Markgrafneusiedel from the south, while two other infantry divisions,
Morand's 1st and Friant's 2nd, attempted to outflank the village.
(General Charles-Alexis-Louis-Antoine Morand got the command of Davout's prestigous 1st Division in 1806.)
 At 10 AM Davout hurled forward his howling columns and lines.
Morand and Friant crossed the Russbach Stream and got under artillery fire.
GdD Morand then formed his division into battalion columns and charged up the slope.
Nordmann sent his light infantry in a counterattack against Morand's flank. The French wavered.
At 10 AM Davout hurled forward his howling columns and lines.
Morand and Friant crossed the Russbach Stream and got under artillery fire.
GdD Morand then formed his division into battalion columns and charged up the slope.
Nordmann sent his light infantry in a counterattack against Morand's flank. The French wavered.
 Rosenberg's infantry defended the tower until French horse battery of Arrighi's division
showered them with cannonballs and canister. While Puthod's division stormed Markgrafneusiedel,
Gudin's division exchanged fire with the whitecoats deployed in open field.
Although GdD Gudin and several senior officers were wounded, it was the enemy who fell back.
Rosenberg's infantry defended the tower until French horse battery of Arrighi's division
showered them with cannonballs and canister. While Puthod's division stormed Markgrafneusiedel,
Gudin's division exchanged fire with the whitecoats deployed in open field.
Although GdD Gudin and several senior officers were wounded, it was the enemy who fell back.
 Grouchy's dragoons, in turn, routed the victorious but disordered by pursuit hussars. Hohenzollern Cuirassiers and O'Reilly Chevauxlegeres came and
forced back the dragoons. But it was Grouchy (see picture -->) who had the last reserve and he drove off the Austrian horse.
Grouchy's dragoons, in turn, routed the victorious but disordered by pursuit hussars. Hohenzollern Cuirassiers and O'Reilly Chevauxlegeres came and
forced back the dragoons. But it was Grouchy (see picture -->) who had the last reserve and he drove off the Austrian horse.
 Cavalry of both sides moved in small columns as the vineyards and huts restricted their
movements. (A vineyard is a plantation of grape-bearing vines, grown mainly for winemaking, but also raisins, table grapes and
non-alcoholic grape juice. See picture -->)
Cavalry of both sides moved in small columns as the vineyards and huts restricted their
movements. (A vineyard is a plantation of grape-bearing vines, grown mainly for winemaking, but also raisins, table grapes and
non-alcoholic grape juice. See picture -->)
 For long hours Oudinot's men suffered from artillery fire. The orders finally came and they
advanced to the Russbach Stream. The French gunners hauled some of their pieces across the stream,
then loaded with canister and fired. The French infantry led by Oudinot captured Baumersdorf,
crossed the stream and advanced up the slope. GdD Oudinot galloped along his line yelling
orders.
For long hours Oudinot's men suffered from artillery fire. The orders finally came and they
advanced to the Russbach Stream. The French gunners hauled some of their pieces across the stream,
then loaded with canister and fired. The French infantry led by Oudinot captured Baumersdorf,
crossed the stream and advanced up the slope. GdD Oudinot galloped along his line yelling
orders.
 MacDonald led his troops personally, aiming in the intersection between
Kollowrath-Krakowski's III Army Corps and Liechtenstein's Grenadier Corps.
As the Austrian artillery opened upon MacDonald with several batteries, firing fast, the French with as many batteries replied.
However, it is not cavalryman or gunner that will determine the result of this confronting
of the two armies, but the man with the musket must do it - the infantry must do the heavy work
MacDonald led his troops personally, aiming in the intersection between
Kollowrath-Krakowski's III Army Corps and Liechtenstein's Grenadier Corps.
As the Austrian artillery opened upon MacDonald with several batteries, firing fast, the French with as many batteries replied.
However, it is not cavalryman or gunner that will determine the result of this confronting
of the two armies, but the man with the musket must do it - the infantry must do the heavy work
 Macdonald's troops were formed as follow (
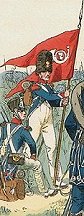 Pacthod's division (of Army of Italy) marched toward Wagram.
On the way the French surprised Austrian grenadier brigade in the flank.
Now came the dreadful battle picture.
Generals were galloping hither and thither - the infantrymen were all in their places, and you might have heard the rattle of several
thousand ramrods as they drove home and "thugged" upon the little globes and cones of lead.
Now began to appear the countless flashes, and the long fiery sheets of the muskets, and the rattle of the volleys, mingled
with the thunder of the guns. Pcthod drove the elite grenadiers toward Aderklaa. The 4 grenadier battalions took cover in the village.
Pacthod's division (9 battalions) stormed the village and after a bloody fight
took it. Commander of the grenadiers, GM de Aspre (French emigree), fell with a mortal wound.
Pacthod's division (of Army of Italy) marched toward Wagram.
On the way the French surprised Austrian grenadier brigade in the flank.
Now came the dreadful battle picture.
Generals were galloping hither and thither - the infantrymen were all in their places, and you might have heard the rattle of several
thousand ramrods as they drove home and "thugged" upon the little globes and cones of lead.
Now began to appear the countless flashes, and the long fiery sheets of the muskets, and the rattle of the volleys, mingled
with the thunder of the guns. Pcthod drove the elite grenadiers toward Aderklaa. The 4 grenadier battalions took cover in the village.
Pacthod's division (9 battalions) stormed the village and after a bloody fight
took it. Commander of the grenadiers, GM de Aspre (French emigree), fell with a mortal wound.
 With the Austrian front broken in several points,
the word "charge" was then given and on the French light cavalry went (see picture).
The hussars and the green-clad chasseurs-a-cheval were upon the enemy with drawn sabers.
The fighting was quite sharp for some time, but the enemy fell back as the French infantry advanced. At one time a
gallant counter-charge was made by a party of Austrian hussars.
With the Austrian front broken in several points,
the word "charge" was then given and on the French light cavalry went (see picture).
The hussars and the green-clad chasseurs-a-cheval were upon the enemy with drawn sabers.
The fighting was quite sharp for some time, but the enemy fell back as the French infantry advanced. At one time a
gallant counter-charge was made by a party of Austrian hussars.
 "A nearsighted French colonel in the Polish Horse almost ruined this elite regiment.
Advancing toward a line of Austrian uhlans, the colonel misjudged the distance
and ordered his unit to right about-face. His subordinate understood that this was disastous because it would allow the uhlans to charge the unit's rear.
He immediately gave the same order again, followed by the command to advance at the trot.
Having performed
"A nearsighted French colonel in the Polish Horse almost ruined this elite regiment.
Advancing toward a line of Austrian uhlans, the colonel misjudged the distance
and ordered his unit to right about-face. His subordinate understood that this was disastous because it would allow the uhlans to charge the unit's rear.
He immediately gave the same order again, followed by the command to advance at the trot.
Having performed  Such fighting as this could not last long.
Especially when Archduke Charles had no hope that his brother Archduke John will reach the battlefield.
At 8 PM he ordered a withdrawal. The horizon was red and flickering with the fires of burning
villages. Black smoke fanned by wind curled into the air in thick whirls.
The sound of pounding horseshoes to their rear meant French cavalry threatened to cut them off
from their line of retreat. Small parties charged in from all sides, the Austrians turned. Then there was a pell-mell rush, the French following in close
pursuit. Many prisoners were captured, and some of Frenchmen, through their impetuosity, were carried away by the
overpowering current of the retreat. The Austrians found themselves overpowered, and fell back closely pressed.
Such fighting as this could not last long.
Especially when Archduke Charles had no hope that his brother Archduke John will reach the battlefield.
At 8 PM he ordered a withdrawal. The horizon was red and flickering with the fires of burning
villages. Black smoke fanned by wind curled into the air in thick whirls.
The sound of pounding horseshoes to their rear meant French cavalry threatened to cut them off
from their line of retreat. Small parties charged in from all sides, the Austrians turned. Then there was a pell-mell rush, the French following in close
pursuit. Many prisoners were captured, and some of Frenchmen, through their impetuosity, were carried away by the
overpowering current of the retreat. The Austrians found themselves overpowered, and fell back closely pressed.
 As the French fought off one crisis after another, the battle proved to be a very close-fought
affair.
Karl von Clausewitz writes: "Though the Austrians were the real defenders at Wagram, they did attack the emperor on
the second day with the greater part of their forces. Therefore Napoleon can also be considered a defender.
With his right wing he attacked, outflanked and defeated the Austrian left wing. At the same time he paid little attention
to his weak left wing, which was resting on the Danube. Yet through strong reserves (i.e., formation in depth), he prevented
the victory of the Austrian right wing from having any influence on his own victory gained on the Russbach."
As the French fought off one crisis after another, the battle proved to be a very close-fought
affair.
Karl von Clausewitz writes: "Though the Austrians were the real defenders at Wagram, they did attack the emperor on
the second day with the greater part of their forces. Therefore Napoleon can also be considered a defender.
With his right wing he attacked, outflanked and defeated the Austrian left wing. At the same time he paid little attention
to his weak left wing, which was resting on the Danube. Yet through strong reserves (i.e., formation in depth), he prevented
the victory of the Austrian right wing from having any influence on his own victory gained on the Russbach."
 Napoleon told that his artillery (see picture --> ) had won the battle. As a special favor, the emperor selected
the son of General Lariboisiere of artillery, to carry the battle news to Paris.
Archduke John's failure to arrive on the battlefield and attack Davout, had a significant
impact. To block John's army Napoleon had only Marmont's corps.
Napoleon told that his artillery (see picture --> ) had won the battle. As a special favor, the emperor selected
the son of General Lariboisiere of artillery, to carry the battle news to Paris.
Archduke John's failure to arrive on the battlefield and attack Davout, had a significant
impact. To block John's army Napoleon had only Marmont's corps.